


DIY Guide to Gunite Pool Tile Repair & Replacement– A beautiful tile finish can turn your gunite pool into a backyard showpiece. But over time, tiles can crack, pop off, fade, or even dislodge due to weather, age, or improper installation. The big question for pool owners is: Should I repair a few tiles myself or replace the entire waterline with professional help?
In this in-depth guide, we’ll cover everything you need about gunite pool tile repair and replacement—from common causes of tile failure to step-by-step DIY instructions, tools you’ll need, and when to call in the pros. If you’re located in New England, we recommend contacting Affordable Pool Repair—a trusted name in gunite pool maintenance and restoration.
Should You Repair or Replace Your Pool Tile?
Whether your pool tile has aged poorly, cracked from freeze-thaw conditions, or is missing in sections, the right approach depends on the extent of the damage.
🛠️ Repair When:
-
Only a few tiles are loose, cracked, or missing
-
You have extra matching tiles from the original build
-
You feel comfortable with basic DIY home repairs
🏗️ Replace When:
-
More than 30–50% of the waterline tile is damaged or missing
-
The tile design is outdated or discontinued
-
The pool is undergoing resurfacing or coping replacement
-
You notice deeper structural problems behind the tile
If the damage is minimal, DIY repair is often sufficient. But if the issue affects large sections or spans beyond cosmetics, it’s time to consider full replacement with professional installation.
Why Pool Tiles Fail: Common Causes
Understanding why tiles fail can help prevent future damage. Here are the most common reasons tiles come loose or crack:
-
Freeze-Thaw Cycles: Water seeps behind tiles and expands when frozen, dislodging tile over time
-
Improper Installation: Weak adhesive or incorrect grout mixes during initial construction
-
Aging Adhesive: Mortar and grout lose bond strength after 10–15 years
-
Unbalanced Pool Chemistry: Acidic or hard water deteriorates grout and tile edges
-
Coping Movement: Shifting the coping stones places tension on the tile line
-
Structural Shifts: Settling soil or water pressure behind the shell can pop tiles
Tools & Materials You’ll Need for DIY Pool Tile Repair
Before you start your tile repair, gather the following:
🧰 Tools:
-
Marginal trowel or putty knife
-
Bucket and sponge
-
Hammer and a small chisel or a flathead screwdriver
-
Tile snips or wet saw (optional for trimming)
-
Rubber grout float or sponge
🧪 Materials:
-
Waterproof pool tile adhesive or white pool-grade mortar (Type 2 white cement)
-
Pool-grade grout (or white plaster mix + crushed marble)
-
Matching or similar pool tile
-
Optional: tile leveling clips for alignment
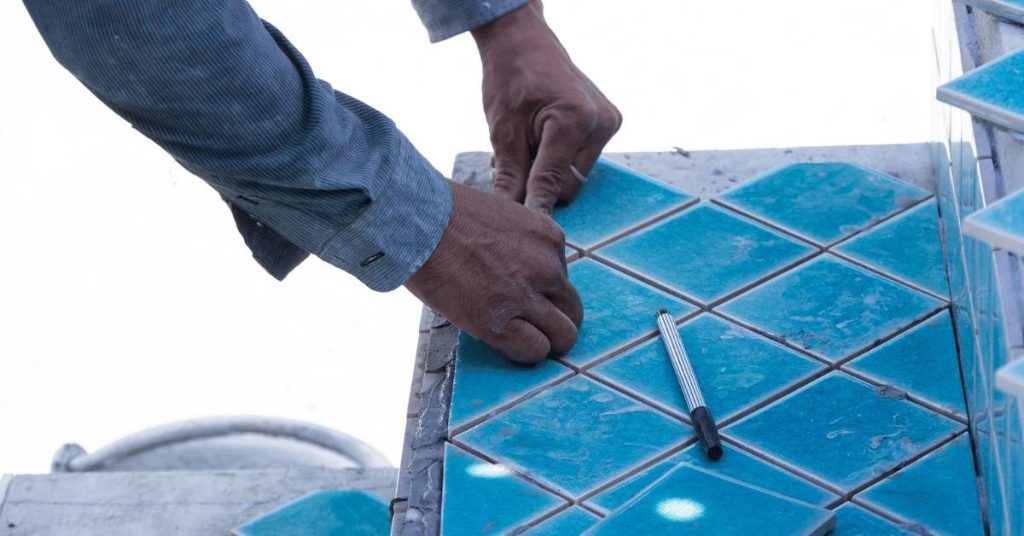
Step-by-Step DIY Gunite Pool Tile Repair Instructions
Step 1: Lower Water Level and Prep the Surface
Lower the water level a few inches below the damaged tile area. Clean the exposed area thoroughly, using your chisel and hammer to remove all loose mortar, grout, or debris. Scrape until the surface is smooth, firm, and dry.
Step 2: Dry Fit the Replacement Tile
Place the replacement tile without adhesive to check if it fits into the empty space. The tile should sit slightly recessed to allow room for mortar to flush it with the surrounding tile.
Step 3: Mix and Apply Tile Mortar
Mix your white mortar or waterproof adhesive to the consistency of peanut butter using a small trowel or putty knife. Apply a thin, even layer to the back of the tile and press it firmly into place.
If it slides or falls, the mixture is too wet—remove it, remix it, and try again. Once set, gently wipe excess mortar around the edges using a damp sponge.
Step 4: Allow Tile to Set
Let the tile set for at least 1–2 hours (refer to your adhesive’s instructions). Avoid getting it wet during this time. A properly placed tile shouldn’t wiggle when tapped lightly.
Step 5: Grout the Tile
Mix your grout slightly thinner than the adhesive. If using white cement, blend in some finely crushed marble for strength and consistency. Apply grout using a sponge or float, pressing into the gaps around the tile.
Wait 10–15 minutes and wipe away excess with a clean, damp sponge. After a few hours, use a dry cloth to remove haze for a polished finish.
Can You Replace Pool Tile Without Draining the Pool?
In some minor cases, like above-waterline tiles, you may be able to replace tiles without draining. But most tile repairs require lowering the water or fully draining the pool for proper bonding and grout curing. Full tile replacement or repairs below the waterline should never be done with water present.
Read: Can You Replace Pool Tile Without Draining the Pool?
When to Hire a Pro Instead of DIY
You should call a professional if:
-
More than 25–30 tiles are missing or damaged
-
Tiles are falling off in large sections or rows
-
The coping above the tile is shifting or cracked
-
You notice water leaks or hollow spots behind tiles
-
You’re upgrading to a new tile entirely
A professional pool tile installer will ensure waterproofing, clean lines, proper adhesion, and long-lasting results. Affordable Pool Repair is a top-rated choice for pool owners in Massachusetts, New Hampshire, and throughout New England.
How to Match Pool Tile That’s Been Discontinued
Finding the exact tile might be difficult if your pool was built over 10 years ago. Here’s what you can do:
-
Check with your pool builder (they may have records or spare stock)
-
Bring a sample to a local tile distributor
-
Look for similar styles or colors and replace entire rows for a cleaner transition
-
Consider a contrasting accent tile or mosaic band for a modern upgrade
Tips to Prevent Pool Tile Damage in the Future
✅ Water Chemistry
-
Maintain pH between 7.4 and 7.6
-
Calcium hardness: 200–400 ppm
-
Avoid shocking near tile edges
✅ Seasonal Prep
-
Properly winterize the pool to prevent ice expansion
-
Avoid over-draining or sudden freeze exposure
✅ Physical Stress
-
Check the coping regularly for movement
-
Seal coping stones and mortar annually in freeze-prone areas
✅ General Maintenance
-
Clean tile line weekly to remove oils and minerals
-
Regrout or seal minor cracks before they spread
Cost Comparison: DIY vs. Professional Tile Repair
| Repair Type | DIY Estimate | Pro Estimate |
|---|---|---|
| 1–5 Tile Replacement | $50–$150 | $300–$500 |
| Full Waterline Retile | $500–$900 (materials only) | $2,000–$5,000+ |
| Structural Leak & Tile Fix | Not Recommended | $3,000–$7,000+ |
DIY works for surface-level fixes. Anything beyond that deserves professional tools, expertise, and warranty-backed work.
Related Links
Key Takeaways
-
DIY pool tile repair is ideal for 1–10 tiles using waterproof adhesive and grout
-
Professionals should handle full tile replacement or deeper damage
-
Maintain water chemistry, seal coping, and inspect for early signs of tile wear
-
For trusted repairs in New England, contact Affordable Pool Repair
Conclusion
Whether dealing with a few missing tiles or considering a full pool tile replacement, it pays to know your options. DIY tile repair is manageable if you have basic tools, patience, and only a few tiles to fix. But if the job grows beyond your skillset—or if tile failure is caused by deeper issues like coping movement or structural instability—calling a pro is the smart move.
With the right approach, you’ll restore your pool’s beauty, protect your investment, and enjoy peace of mind knowing your tile work is done right.
FAQs About Guide to Gunite Pool Tile Repair
1. Can I repair pool tile without draining the water?
In some cases—especially for tiles above the waterline—you may be able to repair without draining. However, lowering the water level or fully draining the pool is recommended for best adhesion and grout curing.
2. What type of adhesive should I use for pool tile repair?
For pool applications, use a waterproof tile adhesive or Type 2 white cement. Avoid regular indoor adhesives, as they can fail in submerged conditions.
3. How long do repaired pool tiles last?
Repaired tiles can last 5–10 years if installed correctly with proper adhesive and grout, depending on water chemistry and maintenance.
4. What’s the best way to match old or discontinued tile?
You can bring a sample to a local tile supplier or replace a full row or section with a contrasting design. Choose a complementary style for a seamless look if exact matches aren’t available.
5. When should I call a professional instead of doing it myself?
Call a pro if you need to replace more than 10 tiles, if you see cracks behind tiles, or if the coping is shifting. Large-scale repairs require specialized tools and waterproofing expertise.


Comments are closed